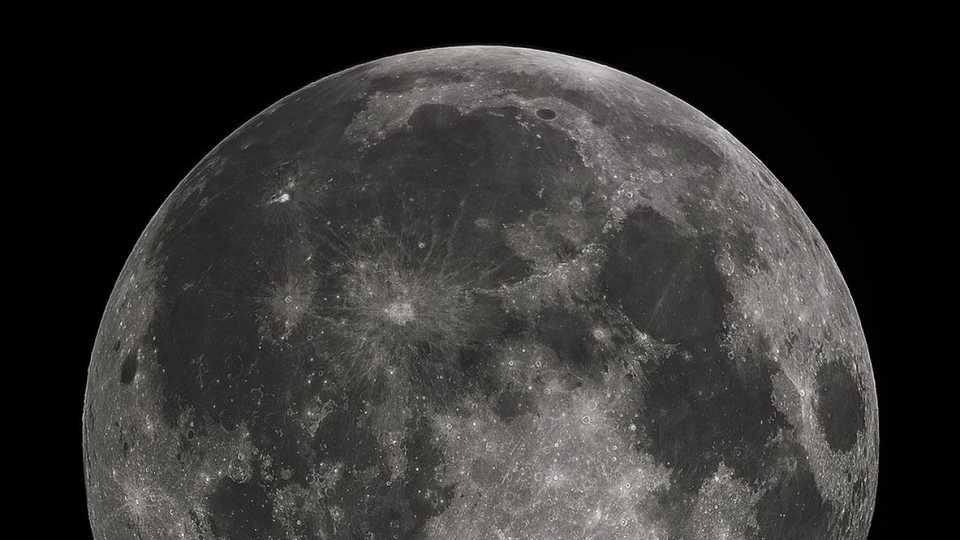
"Full Moon 2010" © Gregory H. Revera
You'll be surprised at how many misconceptions you can debunk by modeling the phases of the moon with a light and a styrofoam ball!
In this activity students will:
- Use models of Earth, the Sun, and the Moon to discover why moon phases occur.
- Learn the order of the moon phases from one full moon to the next.
- 1 Styrofoam ball for every student
- 1 pencil for every student
- A lamp to represent the Sun at the center of the circle
- Lunar Phase: one of the cyclically recurring apparent forms of the moon
- Gibbous: the figure of the moon that is more than half full, looking swollen on one side
- Crescent: the figure of the moon that appears as a curve with pointy ends
- Waxing: growing; describes the moon when the illuminated portion is increasing
- Waning: shrinking; describes the moon when the illuminated portion is decreasing
Follow the instructions in Kinesthetic Astronomy: Set Up to set up your kinesthetic circle.
Ask the class to list possible explanations for the phenomena of moon phases. Try to avoid making comments on the validity of the theories offered. Have students write down their own explanations, based on what they have heard.
Because the visualization in this activity can be difficult for some students, consider doing this activity with a smaller group while the rest of the class works on a moon phase chart or another project, or do this activity more than once.
- Distribute one Styrofoam ball and one pencil to each student, and instruct them to place the pencil into the ball.
- Have students stand in a semicircle or circle facing the lamp. Explain that the lamp represents the Sun and that each of their heads represents Earth, with their noses being their hometown.
- Ask students to hold the model Moon at arm's length. Allow time for them to explore how the model Sun's light reflects off the model Moon as they place it in different positions around their heads. (Students usually observe that their own shadows cover the model Moon when it is opposite the light source, simulating a moon eclipse during the full moon phase. Ask students to hold the model above or below the shadow of their heads, and ignore the eclipse for the time being.)
- Ask each student to position themselves such that they can view the full moon (facing away from the sun).
- How much of the moon does the Earth see illuminated? [the entire circle]
- How much of the moon is actually being hit by the sun’s rays [the front half]
- Remind me, which direction does the Earth rotate on its axis? [counterclockwise]
- Instruct students to rotate counterclockwise like Earth, very slowly, noticing how the light illuminating the moon changes. Stop at key points (gibbous, quarter, new, etc.) but encourage students to observe and describe, rather than shout vocabulary words. At each point, ask questions such as:
- How much of the moon does the Earth see illuminated? How would you describe the shape?
- Which side of the moon appears to grow brighter/darker? [right side for Northern Hemisphere]
- How much of the moon is actually being hit by the sun’s rays? [half]
- Why do astronomer’s call one of the phases “quarter moon” when half of the surface appears lit up? [Tricky answer: Because the moon has completed or has left to complete ¼ of its orbit.]
- Repeat step 5, this time introducing or reviewing vocabulary.
- Earthlings see many phases as the moon orbits the Earth.
- How long do you think it takes for the moon to fully revolve around our planet? Think about how often you might see a full moon. [approximately 1 month; 29.5 days]
- If the orbital period of the moon is 29.5 days, can we sometimes see more than one full moon each month? [Yep! It is possible for a calendar month to have two full moons — one at the beginning and one at the end of the month. When this happens, the second full moon is called a "blue moon," although its color isn't really affected at all. These coincidences happen every few years.]
- Allow time for students to continue to experiment with the movement of the Moon. Consider having them work together to draw a diagram of the Moon's changing position in order to create each phase. You may want to give them the included diagram with empty spaces to fill in drawings and phase names.
- Lead a class discussion in which students can express their new understandings about the phases of the Moon.
- Ask the students to rewrite their explanations for moon phases and discuss any changes from their previous ideas. (Remember: The spinning Earth allows us to observe the Moon rising and setting each day, but this spinning does not affect the phase of the Moon. The changing proportion of the Moon's sunlit side that we see as the Moon orbits Earth causes the moon phases.)
Although everyone is familiar with a few predictable shapes that our moon can take in the sky, misconceptions regarding the cause of these phases abound. Stahly, Krockover and Shepardson (1999), included a list of “five frequently occurring notions featured by children aged 9-16 regarding the phases of the moon”:
- Clouds cover the part of the moon that we cannot see.
- Planets cast shadows on the part of the moon that we cannot see.
- The shadow of the sun falls on the moon, blocking our view of it all.
- The shadow of the earth falls on the moon, blocking our view.
- The phases are explained in terms of the portion of the illuminated side of the moon visible from the earth (scientific viewpoint).
So what causes the moon’s phases? Let’s begin with the basics. The Moon is a natural satellite of planet Earth, taking about a month to revolve all the way around our planet. Its orbit is very nearly circular; it stays about 380,000 kilometers away from us as it moves counterclockwise (as viewed from a northern hemisphere perspective). It also stays fairly close to the Earth's equatorial plane (an imaginary extension of Earth's equator out into space).
As you may expect, the Moon doesn’t just revolve, it also rotates about its own axis – but in quite an interesting fashion. Over the millennia, the Moon has become "locked" into a special kind of motion around the Earth. It rotates on its axis at the same pace as it revolves around the Earth. As a result, the Moon keeps the same face toward us throughout its orbit. (Watching a video is perhaps the best illustration of this). So, you may often hear astronomers talk of the “nearside” and “farside” of the moon. While Earthlings can only view the nearside, astronauts and spacecraft have successfully taken images of the farside. Note that there is not actually a “dark side” of the Moon – with this demonstration, you’ll see how the sun’s rays will strike the entire surface!
The observed phase of the Moon is determined by its position relative to Earth and the Sun. In the 29.5-day period that the Moon takes to orbit the Earth, it will appear as different shapes because of our planet’s viewpoint. In actuality, half of the Moon’s surface is being hit by sunlight. But, because of our relative positions, we’ll see the Moon swell from the new Moon, through the crescent, to the first quarter, to the swollen gibbous moon, and then the full Moon, before waning to the new Moon again. Study the diagram below, but don’t feel intimidated. The kinesthetic portion of the activity will be the most “illuminating”!
For more information, see:
A Private Universe Project: http://www.learner.org/teacherslab/pup/act_moonphase.html
Moon Phases Diagrams: http://www.astrosociety.org/education/publications/tnl/12/12.html
Parts of this lesson are adapted from the Kinesthetic Astronomy program developed by the Space Science Institute, 2004.
Image: "Full Moon 2010"by Gregory H. Revera, licensed and modified under CC BY-SA 3.0; originally sourced from https://en.wikipedia.org/wiki/File:FullMoon2010.jpg
Middle School
MS-ESS1-1: Develop and use a model of the Earth-sun-moon system to describe the cyclic patterns of lunar phases, eclipses of the sun and moon, and season.


